Create your first app
Use this guide to get up to speed on creating your first dexi app
Note: To complete this guide you'll need to be a registered Dexi app developer - and we also advise you are familiar with Java, Spring Boot and REST APIs.
Click here to become a Dexi app developer
You'll also need the latest version of dexictl installed locally - see instructions for that here:
https://github.com/dexiio/dexictl
Create the application
Now you're all set to start building your first app. If you're using a git repository or similar, now is the time to create it. Then use your terminal to clone the repository on your local machine and run the following command:
dexictl create-app my-first-app
For example:
$: git clone [email protected]:my-org/my-first-app.git
$: cd my-first-app
$: dexictl create-app my-first-app
It will look something like this:
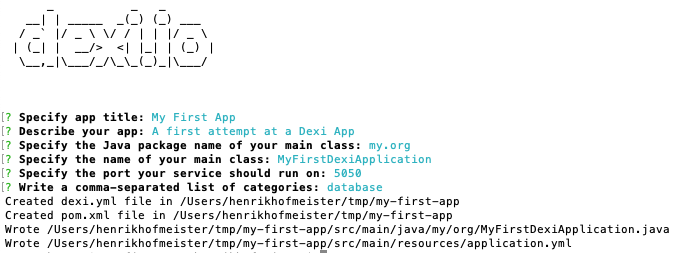
As you might have noticed this created a few files in your folder:
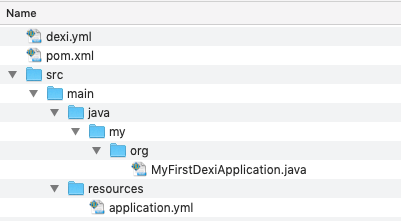
If you're familiar with Java and Spring Boot you will recognise most of them. What has been auto-created is the basics of a new Spring Boot app that already has a dependency on the Dexi Spring Boot App SDK.
package my.org;

import io.dexi.service.EnableDexiAppSDK;
import org.springframework.boot.SpringApplication;
import org.springframework.boot.autoconfigure.SpringBootApplication;

@EnableDexiAppSDK
@SpringBootApplication
public class MyFirstDexiApplication {

    public static void main(String[] args) {
        SpringApplication.run(MyFirstDexiApplication.class, args);
    }

}
spring:
  application:
    name: my-first-app
server:
  port: 5050
<?xml version="1.0" encoding="UTF-8"?>
<project xmlns="http://maven.apache.org/POM/4.0.0"
         xmlns:xsi="http://www.w3.org/2001/XMLSchema-instance"
         xsi:schemaLocation="http://maven.apache.org/POM/4.0.0 http://maven.apache.org/xsd/maven-4.0.0.xsd">
    <modelVersion>4.0.0</modelVersion>

    <groupId>my.org</groupId>
    <artifactId>my-first-app</artifactId>

    <version>1.0.0</version>

    <parent>
        <groupId>org.springframework.boot</groupId>
        <artifactId>spring-boot-starter-parent</artifactId>
        <version>2.0.1.RELEASE</version>
    </parent>

    <properties>
        <project.reporting.outputEncoding>UTF-8</project.reporting.outputEncoding>
        <java.version>1.8</java.version>
        <resource.delimiter>@</resource.delimiter>
        <maven.compiler.source>${java.version}</maven.compiler.source>
        <project.build.sourceEncoding>UTF-8</project.build.sourceEncoding>
        <maven.compiler.target>${java.version}</maven.compiler.target>
    </properties>

    <build>
        <plugins>
            <plugin>
                <groupId>org.apache.maven.plugins</groupId>
                <artifactId>maven-jar-plugin</artifactId>
                <configuration>
                    <archive>
                        <manifest>
                            <addClasspath>true</addClasspath>
                            <mainClass>my.org.MyFirstDexiApplication</mainClass>
                        </manifest>
                    </archive>
                </configuration>
            </plugin>
            <plugin>
                <groupId>org.apache.maven.plugins</groupId>
                <artifactId>maven-shade-plugin</artifactId>
            </plugin>
        </plugins>
    </build>

    <dependencies>

        <!-- DEXI: -->
        <dependency>
            <groupId>io.dexi</groupId>
            <artifactId>spring-app-sdk</artifactId>
            <version>2.0.3</version>
        </dependency>

        <!-- UTILITIES: -->
        <dependency>
            <groupId>org.projectlombok</groupId>
            <artifactId>lombok</artifactId>
            <version>1.18.10</version>
        </dependency>
        <dependency>
            <groupId>commons-io</groupId>
            <artifactId>commons-io</artifactId>
            <version>2.6</version>
        </dependency>

    </dependencies>

</project>
Secondly, a dexi.yml file has been generated which you should edit now and adjust according to your needs. The dexi.yml file describes how Dexi should to talk to your app including authentication - and also what your app can do. The dexi.yml file and it's contents is explained in-depth here
The first thing to do when starting a new app is implementing the ActivationHandler. Note that you'll need a configuration class for this purpose that will hold your apps activation configuration properties.
The activation handler is discussed more in-depth here - but the short version is you only need to implement the validate method and if you do not want to perform any validation at this time it can just be empty.
package my.org.handlers;

import io.dexi.service.exceptions.ActivationException;
import io.dexi.service.exceptions.UserErrorException;
import io.dexi.service.handlers.ActivationHandler;
import my.org.data.MyFirstAppConfig;
import org.apache.commons.lang.StringUtils;
import org.springframework.stereotype.Component;

@Component //Make sure you annotate this with @Component
public class MyFirstAppActivationHandler implements ActivationHandler<MyFirstAppConfig> {

    @Override
    public Class<MyFirstAppConfig> getActivationConfigClass() {
        return MyFirstAppConfig.class;
    }

    @Override
    public void validate(MyFirstAppConfig activationConfig) throws ActivationException {

        if (StringUtils.isBlank(activationConfig.getMyUsername())) {
            throw new UserErrorException("Username is required!");
        }
    }
}
package my.org.data;

import lombok.Data;

@Data //Uses lombok to generate getters / setters
public class MyFirstAppConfig {

    private String myUsername;

    private String myPassword;

}
Once this is done your app service is able to start. Try that now using either your IDE of choice or simply running mvn spring-boot:run from the terminal in the folder where your app is located. The application should run and start listening on the port you specified when you generated the app.
We should make sure to adjust the dexi.yml file to fit our configuration object:
apiVersion: apps.dexi.io/v1.0
kind: App
name: my-first-app
title: My First App
description: My very first dexi app
appUrl: https://dexi.io
categories:
- database

properties:
# Properties are just a list of global values that can be used throughout this specification using ${propertyName}
  baseUrl: http://localhost:5050/ # Change this when your app is released publicly

specification:
# Specification contains global app endpoints for using when activating the app on an account

  validate: #Defines the validation endpoint. Is called to validate the activation-level configuration
    url: "${baseUrl}/dexi/activations/validate"
    method: POST

  configuration: #Configuration for activating the app
    myUsername:
      title: A username
      type: string
      required: true
    myPassword:
        title: A username
        type: password # Supported types are string,enum,integer,boolean,password
You've now completed the basic setup and configuration of a Dexi app. Now we will start adding functionality to your app.
Adding components
Next you need to decide what components you want to include in your app - and then start implementing them. The Dexi App SDK provides interfaces for all available component types, so all you need to do is implement the relevant ones and use the same name as you have used in your dexi.yml. Note that the Javadoc of each interface documents how and where it will be exposed on the REST API. You can also have a look at the generated dexi.yml file which uses the correct paths for the different component type examples included there.
Note on naming components
You can always add more components later to your Dexi app. However removing or renaming them is considered a breaking change which will require all users of the app to reconfigure their uses of your app - so try to pick some good and descriptive names.
The available component types and their interfaces are in the table below. All are available in the java package io.dexi.services.components.
Click here to see an overview of all component types and their java interfaces
For this walk-through we have decided to implement a Data Filter as that allows both to receive rows and return results.
First we define the YAML for the component in the dexi.yml file.
components:
- name: convert-to-json
  type: data-filter
  title: To JSON
  description: Converts rows to JSON strings

  specification:
    inputs: {} #Empty object means accepts anything

    outputs:
      json:
        title: "JSON output"
        type: string

    endpoint:
      url: "${baseUrl}/dexi/data/filter/invoke"
      method: POST
And then we can implement the component as you see below. It's important you implement to correct interface for the component type (see table here), that you annotate your class with @AppComponent - and provide the exact name of the component that you've defined in the dexi.yml file.
package my.org.components;

import com.fasterxml.jackson.databind.ObjectMapper;
import io.dexi.service.AppContext;
import io.dexi.service.components.AppComponent;
import io.dexi.service.components.DataFilterAppComponent;
import io.dexi.service.exceptions.UserErrorException;
import io.dexi.service.utils.ResultStream;
import io.dexi.service.utils.RowStream;
import my.org.data.ConvertToJsonConfig;
import my.org.data.MyFirstAppConfig;

import java.io.IOException;
import java.util.Collections;
import java.util.Map;

@AppComponent("convert-to-json")
public class ConvertToJsonAppComponent implements DataFilterAppComponent<MyFirstAppConfig, ConvertToJsonConfig> {

    private static final String OUTPUT_FIELD = "json";

    private final ObjectMapper objectMapper;

    public ConvertToJsonAppComponent(ObjectMapper objectMapper) {
        this.objectMapper = objectMapper;
    }

    @Override
    public void filter(AppContext<MyFirstAppConfig, ConvertToJsonConfig> ctxt, RowStream inputs, ResultStream outputs) {
        try {
            while (inputs.hasNext()) {
                //Go through all the inputs we're given
                final Map<String, Object> input = inputs.next();

                //Convert each of them to a JSON string using Jacksons object mapper
                final String jsonValue = objectMapper.writeValueAsString(input);

                //Append it to the output
                outputs.append(Collections.singletonMap(OUTPUT_FIELD, jsonValue));
            }
        } catch (IOException e) {
            throw new UserErrorException("Failed to read input");
        }
    }

    @Override
    public Class<ConvertToJsonConfig> getComponentConfigClass() {
        return ConvertToJsonConfig.class;
    }
}
And that's it - you have now implemented a fully functional Dexi app that converts any object to a JSON string. The entire dexi.yml file should now look like this:
apiVersion: apps.dexi.io/v1.0
kind: App
name: my-first-app
title: My First App
description: My very first dexi app
appUrl: https://dexi.io
categories:
- database

properties:
# Properties are just a list of global values that can be used throughout this specification using ${propertyName}
  baseUrl: http://localhost:5050/ # Change this when your app is released publicly

specification:
# Specification contains global app endpoints for using when activating the app on an account

  validate: #Defines the validation endpoint. Is called to validate the activation-level configuration
    url: "${baseUrl}/dexi/activations/validate"
    method: POST

  configuration: #Configuration for activating the app
    myUsername:
      title: A username
      type: string
      required: true
    myPassword:
        title: A username
        type: password # Supported types are string,enum,integer,boolean,password

components:
- name: convert-to-json
  type: data-filter
  title: To JSON
  description: Converts rows to JSON strings

  specification:
    inputs: {} #Empty object means accepts anything

    outputs:
      json:
        title: "JSON output"
        type: string

    endpoint:
      url: "${baseUrl}/dexi/data/filter/invoke"
      method: POST
Testing locally
To test your app you must first register it with Dexi. The easiest way to do that is using the dexictl command line utility.
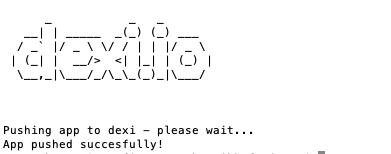
Simply open your terminal and navigate to the folder that contains your dexi.yml file and run dexictl push-app. This will automatically create the app if it doesn't exist - or later - update it with a new version. You should see something like this:
Now you can head to your developer interface found here: https://app.dexi.io/#/developer - and you should be able to see your app in your list of apps:
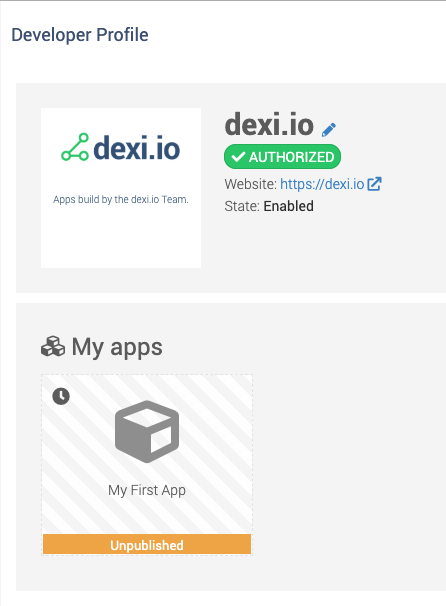
Click the app to open it - and enable it by clicking the check-slider "Enabled":
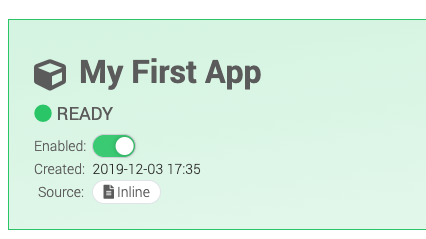
You can also upload a logo for your app and change its name and description on the Dexi platform.
Now that you've registered your app you can start testing it:
- Start your app on your local machine - either through your IDE or by running
mvn spring-boot:runfrom the command line. - Open a terminal and navigate to the folder that contains the
dexi.ymlfile and rundexictl develop 5050. This will create a tunnel from your local machine to the Dexi platform allowing you to interact with your app service running on your local machine - through the online Dexi platform. - You should now see some log output similar to this:

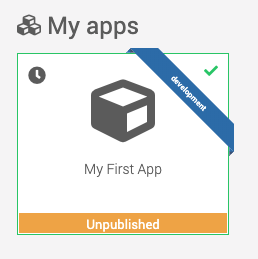
If you refresh your Developer page on Dexi you should see the blue "development" ribbon as you see on the following screenshot. The development version of the app is only available to your user - also after the app has been published.
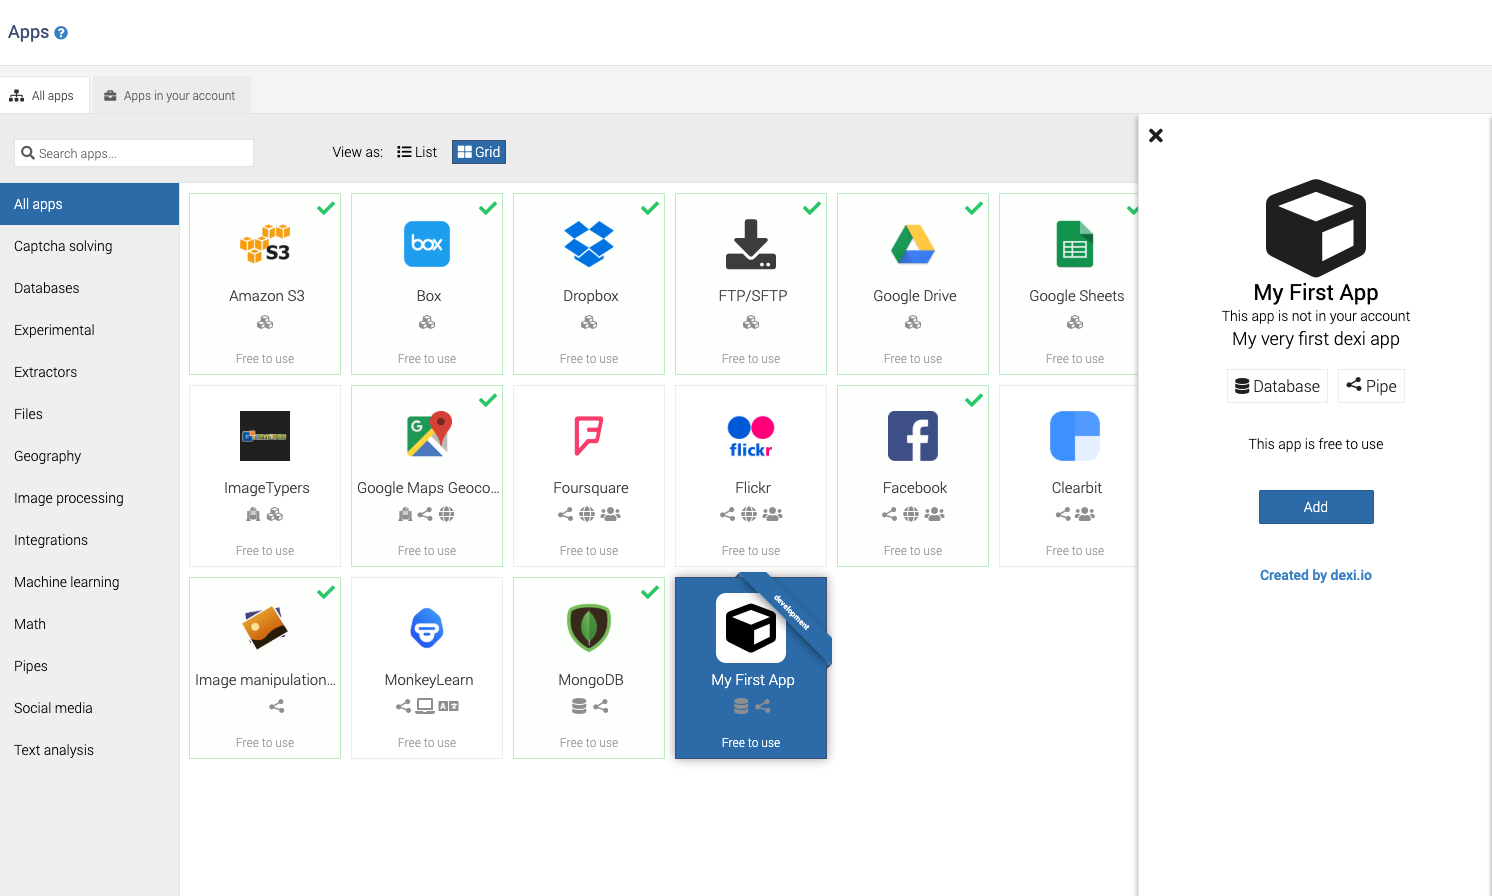
You can now test your app from within the Developer UI - or head to the app store on Dexi where you'll also see it and be able to activate it for your own account only:
Deploying publicly
Once you have tested your app and you are satisfied with the results, you will need to run the app service somewhere that can be reached by the Dexi platform. This could be anywhere and we recommend running such services on one of the various Serverless services available for Docker images such as Google Cloud Run or AWS Fargate.
Note that you need to provide a configuration file to your service for Spring. On your local machine we've created one for you in ~/.dexi/configuration.yml
Once you've deployed it somewhere public, you need to update the baseUrl property in your dexi.yml. Your dexi.yml properties should look something like this:
properties:
  baseUrl: https://my-first-dexi-app.my-public-host.com/
- Stop the
dexictl developprocess if it is still running. You should be able to see the development ribbon disappear from the Dexi platform within a few seconds. You might need to refresh the page. - Now run
dexictl push-appone more time. This will create a new version for you. Set the version as the "current" version if it doesn't automatically happens. - Once your app is up and available on the public URL you can start testing it again.
If you need to do local testing, you can always run dexictl develop 5050 which will temporarily route all traffic for the app for your user only to your local machine.
Success!
We hope you've enjoyed this walk through and please do reach out for more information on creating apps on dexi.io
Updated almost 6 years ago
